self-image/friendship
Body image and friends are two very large personal aspects which impact on every one’s life. How much they will affect a person during the course of their life will vary for each and every individual. At times you may just need some help. The most important thing to do then is to ask for it. Friends and family are the last people in the world that want see anything happen to you. You are special and unique, you are not meant to be anyone else but YOU! But if there are times those you love are unable to help you then seek other professional sources. Also remember that friendship is not just a one way street, you must give too. By listening to and considering others you in turn help them to have a happier life.
For this module your teacher will ask you to watch an episode from the My Great Big Adventure which has been produced in Australia by ABC 3 and is rated G. Then using Microsoft PowerPoint or a similar computer based program, you will design a slideshow covering the area you have been asked to watch. By going to the web link below, you will be able to select the suggested episode (each episode is approximately 30 minutes in length).
Areas covered are:-
1. Bullying
2. Family friction
3. Tech Life
4. Friendship
5. Stress
6. Winning and Losing
7. Body Image
8. Disability
9. Identity
Your slide show needs to be at least six slides in length and cover the main ideas expressed in the episode. It must be factual and informative and have relevant pictures and text. These slides can be printed or downloaded to be incorporated into you resource kit.
Slide Show Checklist:-
o Six slides or more.
o Six facts highlighted in the episode as important to health.
o Has information which is relevant to the episode ________
o It must be factual and informative.
o Have relevant pictures and text.
o Text is easy to read, font size at least 20point.
o Slides printed or downloaded to be incorporated into resource kit.
My Great Big Adventure ABC3
Website:- For topic, click on topic printed on ribbon when in site website page. Press link below.
http://www.abc.net.au/abc3/mygreatbigadventure/
http://www.abc.net.au/abc3/mygreatbigadventure/
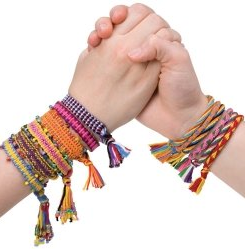
Friendship bracelets are a cheap, fun way to show those you care about that you’re thinking of them. Watch the slide show and download the instructions and have a go!
Friendship Bracelets
Things You'll Need
2.Measure and cut your first strand. Measure a length of thread slightly longer than the distance from your fingertip to your shoulder, then cut it.
3. Use the cut strand to measure and cut the remaining strands. You need to have at least 3 strings to make this bracelet, but you can have as many as you want. 4 to 6 will make a really skinny bracelet; 8 to 10 will make a thick one. Don’t feel obligated to make every strand a different color; using the same color multiple times will result in more (or thicker) stripes of that color depending on how you arrange them.
4. Tie all the ends of the threads together in a square knot and fasten it to something. There are various ways to hold the bracelet in place while you're making it.Spread the threads out so that, from left to right, the colors are in your desired order. To make the knotted end of your bracelet less bulky, try not to cross the threads over one another too much.
5. For additional flair, make several short braids in the bracelet before spreading the strands out to begin the pattern. Later, you can do the same thing at the opposite end to make the bracelet more interesting (not to mention easier to tie shut).
6. Knot the far left thread (Strand 1) around the thread immediately to its right (Strand 2). Loop it over the front of Strand 2, then around the back, and, finally, up through the loop you’ve created. Pull the end to tighten Strand 1 into a knot.
7. Repeat to make a second knot. As you knot Strand 1, hold Strand 2 taut; this way, you will tie Strand 1 around Strand 2, not with it. Immediate right, moving horizontally across the entire row of threads. Use the same method outlined in the previous step for each knot. Eventually, you will have made knots of this color across the entire row.
8. Repeat using Strand 2, tying the new knots below the existing ones. When you’re done, you will have made a second row of colored knots beneath the first.Continue knotting rows of knots across the threads until the bracelet is the right length. To make sure it fits well, try it on your wrist, there should be enough extra room that you can fit about 2 fingers in next to your wrist, since the bracelet can shrink in water and become too tight (although it will stretch back out when dry).
9. Finish the end of the bracelet in braids if necessary. Be sure to make as many the second time as you did the first.
Tie the loose ends of your strings into a second square knot. Make sure that the knot doesn’t take up any of the length you need to wear the bracelet.
10. Trim any loose ends. Your bracelet is now ready to give to a good friend!
Finished.
- Embroidery thread
- Scissors
- Safety pin(s)
- Beads and/or charms (optional)
2.Measure and cut your first strand. Measure a length of thread slightly longer than the distance from your fingertip to your shoulder, then cut it.
3. Use the cut strand to measure and cut the remaining strands. You need to have at least 3 strings to make this bracelet, but you can have as many as you want. 4 to 6 will make a really skinny bracelet; 8 to 10 will make a thick one. Don’t feel obligated to make every strand a different color; using the same color multiple times will result in more (or thicker) stripes of that color depending on how you arrange them.
4. Tie all the ends of the threads together in a square knot and fasten it to something. There are various ways to hold the bracelet in place while you're making it.Spread the threads out so that, from left to right, the colors are in your desired order. To make the knotted end of your bracelet less bulky, try not to cross the threads over one another too much.
5. For additional flair, make several short braids in the bracelet before spreading the strands out to begin the pattern. Later, you can do the same thing at the opposite end to make the bracelet more interesting (not to mention easier to tie shut).
6. Knot the far left thread (Strand 1) around the thread immediately to its right (Strand 2). Loop it over the front of Strand 2, then around the back, and, finally, up through the loop you’ve created. Pull the end to tighten Strand 1 into a knot.
7. Repeat to make a second knot. As you knot Strand 1, hold Strand 2 taut; this way, you will tie Strand 1 around Strand 2, not with it. Immediate right, moving horizontally across the entire row of threads. Use the same method outlined in the previous step for each knot. Eventually, you will have made knots of this color across the entire row.
8. Repeat using Strand 2, tying the new knots below the existing ones. When you’re done, you will have made a second row of colored knots beneath the first.Continue knotting rows of knots across the threads until the bracelet is the right length. To make sure it fits well, try it on your wrist, there should be enough extra room that you can fit about 2 fingers in next to your wrist, since the bracelet can shrink in water and become too tight (although it will stretch back out when dry).
9. Finish the end of the bracelet in braids if necessary. Be sure to make as many the second time as you did the first.
Tie the loose ends of your strings into a second square knot. Make sure that the knot doesn’t take up any of the length you need to wear the bracelet.
10. Trim any loose ends. Your bracelet is now ready to give to a good friend!
Finished.
Press on link below to get written instructions for a friendship bracelet.
http://friendship-bracelets.net/pdf/patterns/striped.pdf
http://www.abc.net.au/abc3/mygreatbigadventure/
http://www.wikihow.com/Make-a-Friendship-Bracelet
